Olivia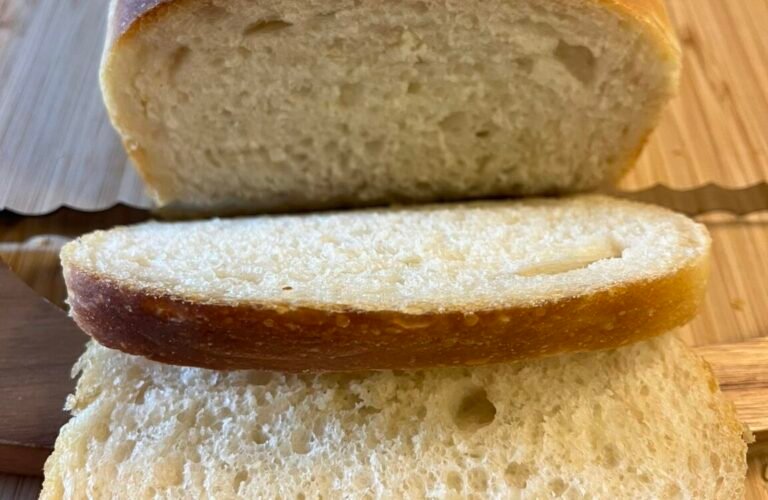
Sourdough Sandwich Bread Recipe
There’s something deeply satisfying about baking your own sourdough sandwich bread. Unlike rustic artisan loaves with thick crusts and giant holes, sandwich bread is softer, more tender, and perfect for toast, grilled cheese, breakfast sandwiches, or everyday lunches. This recipe gives you a loaf with a light tangy flavor, fluffy crumb, and golden crust while still keeping the character of natural sourdough fermentation.
Whether you are new to sourdough or already have an active starter bubbling on your counter, this recipe is designed to be simple, reliable, and rewarding.
Why You’ll Love This Bread
This sourdough sandwich bread is:
- Soft and sliceable
- Naturally leavened with no commercial yeast
- Great for sandwiches and toast
- Mildly tangy instead of overly sour
- Easy to store and freeze
- Rich in flavor with a tender texture
The addition of milk, butter, and a little honey makes the loaf softer than traditional country sourdough bread. It stays fresh for several days and makes excellent toast.
Ingredients
You’ll need the following ingredients:
- 500 grams bread flour (about 4 cups)
- 100 grams active sourdough starter
- 300 grams warm milk
- 50 grams warm water
- 40 grams honey or sugar
- 40 grams softened butter
- 10 grams salt
Optional:
- Melted butter for brushing the top after baking
- Rolled oats or sesame seeds for topping
Equipment
Helpful tools include:
- Large mixing bowl
- Kitchen scale
- Loaf pan (9×5 inch works well)
- Dough scraper
- Clean towel or plastic wrap
- Cooling rack
A stand mixer is optional, but this bread can easily be mixed and kneaded by hand.
Step 1: Feed Your Starter
Your sourdough starter should be active and bubbly before baking. Feed it about 4–6 hours before mixing the dough. It should double in size and smell pleasantly yeasty and slightly tangy.
A healthy starter is the heart of good sourdough bread. If your starter is weak or sluggish, the bread may rise slowly.
Step 2: Mix the Dough
In a large bowl, combine the warm milk, warm water, sourdough starter, and honey. Stir until the starter dissolves.
Add the flour and mix until a shaggy dough forms. Let the dough rest for 20–30 minutes. This rest period is called autolyse and helps hydrate the flour.
After resting, add the salt and softened butter. Knead the dough until smooth and elastic. This usually takes:
- 8–10 minutes in a stand mixer
- 10–15 minutes by hand
The dough should feel soft and slightly tacky but not overly sticky.
Step 3: Bulk Fermentation
Place the dough in a lightly greased bowl. Cover with a towel or plastic wrap.
Let the dough rise at room temperature for about 4–6 hours, depending on the warmth of your kitchen. During this time, perform 3–4 sets of stretch and folds during the first 2 hours.
To stretch and fold:
- Grab one side of the dough
- Stretch it upward
- Fold it over itself
- Rotate the bowl and repeat
This strengthens the gluten without aggressive kneading.
The dough is ready when it looks puffed, airy, and has increased in size by roughly 50%.
Step 4: Shape the Loaf
Turn the dough onto a lightly floured surface.
Gently flatten it into a rectangle, then roll it tightly into a log shape. Pinch the seam closed.
Place the dough seam-side down into a greased loaf pan.
Proper shaping creates structure and gives the bread its classic sandwich loaf appearance.
Step 5: Final Proof
Cover the loaf pan loosely and let the dough rise again until the dough crowns about 1–2 inches above the rim of the pan.
This usually takes 2–4 hours depending on temperature.
For deeper flavor, you can refrigerate the loaf overnight during this stage. The next day, let it sit at room temperature while the oven preheats.
The dough should look puffy and soft. If you gently press it with a finger, the indentation should slowly spring back.
Step 6: Bake the Bread
Preheat your oven to 375°F (190°C).
Bake the loaf for 35–40 minutes until golden brown. The internal temperature should reach about 200°F (93°C).
If the top browns too quickly, loosely tent it with foil during the last 10–15 minutes.
Once baked, remove the bread from the pan immediately and place it on a cooling rack.
Brush the top with melted butter for a softer crust.
Let the bread cool completely before slicing. Cutting too early can make the crumb gummy.
Texture and Flavor
This bread has a soft, fluffy interior with a thin golden crust. The flavor is balanced—slightly tangy from the sourdough starter but mild enough for everyday sandwiches.
It’s delicious with:
- Butter and jam
- Peanut butter
- Grilled cheese
- Turkey sandwiches
- French toast
- Avocado toast
Because of the natural fermentation, the bread also tends to digest more easily than many commercial loaves.
Storage Tips
Store the bread in a sealed bag or bread box at room temperature for up to 4 days.
To freeze:
- Slice the loaf completely
- Wrap tightly
- Freeze for up to 3 months
You can toast slices directly from frozen.
Avoid refrigerating the bread, as it can dry out faster.
Common Problems and Fixes
Dense Bread
Usually caused by:
- Weak starter
- Underproofing
- Cold kitchen
Make sure your starter is active and give the dough enough time to rise.
Gummy Texture
This often happens when:
- The bread is sliced too early
- The loaf is underbaked
Always cool completely before cutting.
Flat Loaf
Possible causes:
- Overproofing
- Too much liquid
- Weak shaping
Shape tightly and avoid letting the dough rise excessively before baking.
Variations
You can customize this bread easily:
- Add shredded cheese
- Mix in herbs
- Use whole wheat flour for part of the flour
- Add cinnamon and raisins
- Sprinkle oats on top
For softer bread, replace part of the milk with cream or add an extra tablespoon of butter.
Final Thoughts
Baking sourdough sandwich bread is one of the most rewarding kitchen projects. It combines the rich flavor of traditional sourdough with the softness and practicality of everyday sandwich bread. Once you make it a few times, the process becomes relaxing and intuitive.
The smell of fresh bread filling your kitchen, the crackle of the crust as it cools, and the first warm slice with butter make the effort worthwhile every single time.
With patience, a healthy starter, and this recipe, you can create homemade sandwich bread that tastes far better than most store-bought loaves.