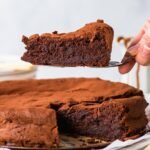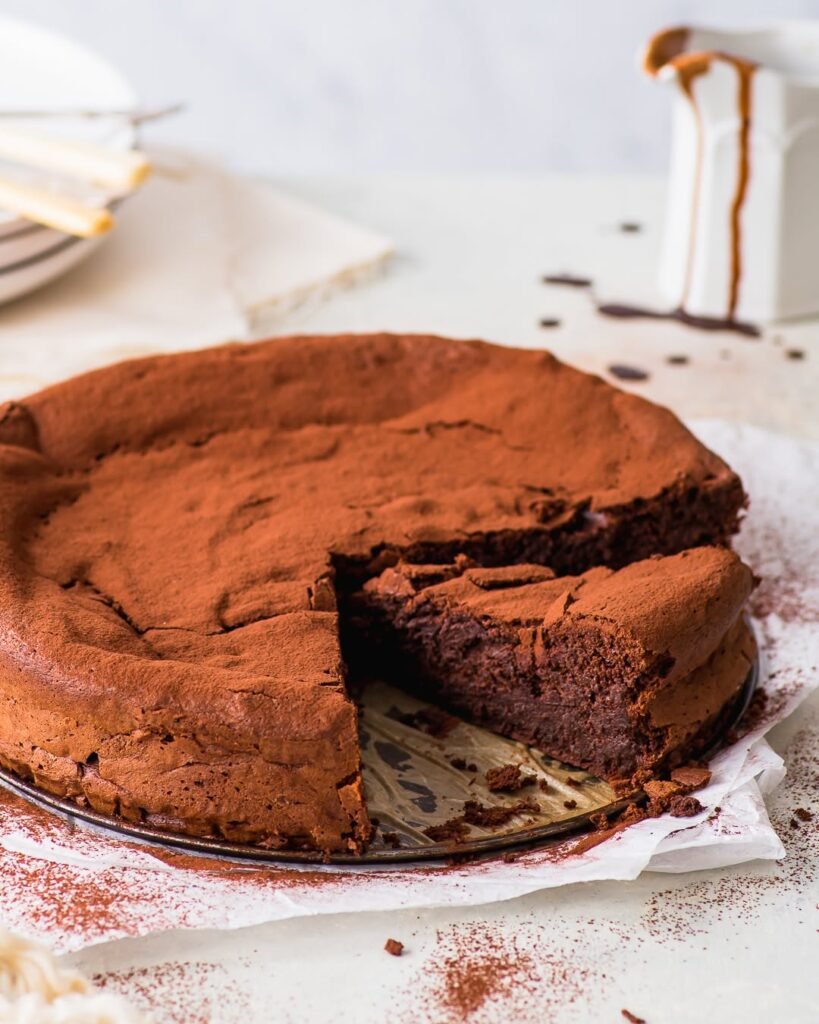

If you love rich, intensely chocolatey desserts and have sourdough starter or discard waiting in your kitchen, this Sourdough 6-Ingredient Flourless Chocolate Cake is a wonderful treat to make. It has the luxurious texture of a flourless chocolate cake while adding the subtle tang of sourdough for extra depth of flavor.
This cake is dense and fudgy in the center, with a delicate crackly top and a texture somewhere between a chocolate truffle and silky chocolate mousse. It is naturally flourless, making it a great option when you want a simple chocolate dessert without traditional wheat flour.
The recipe uses just six main ingredients, and the sourdough starter adds a gentle fermented flavor that pairs beautifully with dark chocolate. Serve it simply with a dusting of cocoa powder or powdered sugar, or add fresh berries and whipped cream for a more impressive dessert.
Why You’ll Love This Sourdough Flourless Chocolate Cake
There are plenty of reasons to keep this recipe in your dessert rotation:
- Only 6 main ingredients
- No traditional flour required
- Rich and deeply chocolatey
- Fudgy, truffle-like center
- Slight sourdough tang balances the sweetness
- Easy enough for beginners
- Beautiful crackly top
- Perfect for dinner parties and special occasions
- Delicious served warm or completely cooled
- A useful way to enjoy sourdough starter
The key to the cake’s texture is the whipped egg whites. Instead of relying on flour or a large amount of chemical leavening, the beaten egg whites provide structure and air. Folding them carefully into the chocolate mixture creates a lightness while keeping the finished cake wonderfully rich.
Ingredients
You only need six main ingredients for this cake.
1. Dark Chocolate
Use good-quality dark chocolate for the best flavor. Chocolate with around 60% or more cocoa works especially well. Chopped chocolate melts smoothly and gives the cake its deep chocolate flavor.
2. Unsalted Butter
Butter creates a smooth, rich texture and helps make the cake beautifully fudgy. Unsalted butter also allows you to control the amount of salt in the recipe.
3. Eggs
You will separate the eggs. The yolks add richness and help create the creamy chocolate batter, while the whites are whipped with sugar to form a meringue.
4. Granulated Sugar
Sugar sweetens the cake while also helping stabilize the whipped egg whites.
5. Cocoa Powder
Unsweetened cocoa powder intensifies the chocolate flavor and gives the cake its beautiful dark color.
6. Sourdough Starter or Discard
Use sourdough starter or discard for the signature fermented flavor. The sourdough adds a subtle tang that works particularly well with dark chocolate.
Additional Salt
A small amount of salt enhances the chocolate flavor and balances the sweetness.
Ingredients at a Glance
- 300 g dark chocolate, chopped
- 140 g unsalted butter, cubed
- 8 medium eggs, separated
- 200 g granulated sugar
- 40 g unsweetened cocoa powder
- 100 g sourdough starter or discard
- ½ teaspoon salt
Equipment
You will need:
- 9-inch (23 cm) springform pan
- Parchment paper
- Heatproof bowl
- Saucepan
- Electric mixer or stand mixer
- Large mixing bowl
- Rubber spatula
- Wire cooling rack
- Fine-mesh sieve
How to Make Sourdough 6-Ingredient Flourless Chocolate Cake
Step 1: Prepare the Pan
Preheat your oven to 355°F (180°C).
Line the bottom of a 9-inch springform pan with parchment paper. Lightly grease the sides if desired.
Because this is a flourless cake, lining the bottom is especially helpful when you want to remove the cake neatly after baking.
Step 2: Melt the Chocolate and Butter
Place the chopped dark chocolate and cubed butter in a heatproof bowl.
Set the bowl over a saucepan containing gently simmering water. Make sure the bottom of the bowl does not touch the water.
Stir occasionally until the chocolate and butter are completely melted and smooth.
Remove the bowl from the heat and allow the mixture to cool slightly.
Do not add the eggs while the chocolate mixture is extremely hot, as the heat could partially cook the yolks.
Step 3: Add the Egg Yolks
Separate the eggs carefully, placing the whites in a large clean mixing bowl.
Add the egg yolks to the slightly cooled chocolate mixture. Stir until combined.
Add the sourdough starter or discard and mix until incorporated.
The sourdough gives the batter a slight tang and adds another layer of flavor to the rich chocolate.
Step 4: Add Cocoa Powder and Salt
Sift the cocoa powder into the chocolate mixture.
Add the salt and stir gently until everything is combined.
At this point, the chocolate mixture may become quite thick. That is completely normal.
Set it aside while you prepare the meringue.
Step 5: Whip the Egg Whites
Using a clean electric mixer, begin whipping the egg whites.
Once they become foamy, gradually add the granulated sugar.
Continue beating until the whites form firm, glossy peaks.
The meringue should hold its shape when the beaters are lifted.
Avoid overbeating the egg whites until they become dry or clumpy because this can make folding more difficult.
Step 6: Loosen the Chocolate Mixture
Add about one-third of the whipped egg whites to the chocolate mixture.
Fold gently with a rubber spatula.
This first portion can be mixed slightly more firmly because its purpose is to loosen the dense chocolate batter.
Once the mixture becomes easier to fold, add the remaining whipped egg whites in two additions.
Use gentle folding motions rather than stirring. The goal is to keep as much air in the meringue as possible.
Step 7: Transfer to the Pan
Pour the finished batter into the prepared springform pan.
Use a spatula to gently level the surface.
Do not tap or bang the pan repeatedly because this can remove some of the air you worked into the egg whites.
Step 8: Bake
Place the cake in the preheated oven and bake for approximately 30 minutes.
The cake should rise and develop a delicate crackly crust on top.
The center should remain moist and fudgy.
Unlike a traditional sponge cake, you do not want a toothpick inserted into the center to come out completely clean. A few moist crumbs or slightly underbaked chocolate should remain.
Overbaking will make the cake drier and reduce the luxurious fudgy texture.
Step 9: Cool the Cake
Remove the cake from the oven and allow it to cool in the springform pan for about 5–10 minutes.
Carefully release the sides of the pan.
As the cake cools, it will naturally sink or collapse slightly in the center. This is normal for a flourless chocolate cake and is part of its characteristic texture.
Allow it to cool completely on a wire rack.
Step 10: Finish and Serve
Once cooled, dust the top with unsweetened cocoa powder or powdered sugar.
For an extra-special presentation, serve each slice with fresh berries, softly whipped cream, or a spoonful of yogurt.
Cut into wedges and enjoy.
What Makes This Cake So Fudgy?
The combination of melted chocolate, butter, egg yolks, cocoa powder, and whipped egg whites creates the cake’s distinctive texture.
There is no traditional flour structure holding the cake in place. Instead, the eggs provide much of the structure while the chocolate and butter create richness.
The whipped egg whites introduce air into the batter, allowing the cake to rise during baking. As it cools, some of that air naturally escapes, causing the cake to settle.
That is why your finished cake may look slightly sunken after cooling. It does not mean the recipe failed.
Tips for Success
Use Good Chocolate
Since chocolate is one of the main ingredients, its quality makes a noticeable difference. Choose a dark chocolate you enjoy eating on its own.
Use Room-Temperature Eggs
Room-temperature egg whites generally whip more easily and can create a more stable meringue.
Keep the Bowl for Egg Whites Clean
Even a small amount of egg yolk or grease can interfere with whipping egg whites. Use a clean, dry bowl and clean beaters.
Fold Gently
The whipped egg whites provide much of the cake’s lift. Fold carefully to preserve the air.
Don’t Overbake
The cake should remain moist in the center. A completely clean toothpick is not the goal for this dessert.
Let It Cool
Allowing the cake to cool completely gives the chocolate time to set and makes slicing easier.
How to Serve It
This cake is rich enough to serve on its own, but there are many delicious ways to finish it.
Try serving slices with:
- Fresh strawberries
- Raspberries
- Blueberries
- Whipped cream
- Vanilla yogurt
- Powdered sugar
- Cocoa powder
- Chocolate sauce
- Fresh mint
- A scoop of vanilla ice cream
For a dinner-party dessert, place a slice on a plate with a small spoonful of whipped cream and a handful of fresh berries.
Can I Use Sourdough Discard?
Yes. Sourdough discard works beautifully in this recipe.
Because the discard is being used for flavor rather than as the primary leavening agent, it does not need to be recently fed. A mature discard can provide a pleasant tang that complements the dark chocolate.
For the best result, use a sourdough starter with a normal, pleasant fermented aroma.
Is This Cake Gluten-Free?
The cake is made without traditional flour, but if you need the finished dessert to meet strict gluten-free requirements, check the labels of your chocolate, cocoa powder, sourdough starter, and other ingredients and use ingredients that are certified gluten-free as appropriate.
Because conventional sourdough starter is generally made with wheat flour, simply calling the recipe flourless does not automatically make a sourdough version gluten-free.
Storage
Allow the cake to cool completely before storing it.
Keep it in a tightly closed container at room temperature in a cool, dry place for approximately 5–6 days, provided your ingredients and kitchen conditions allow for this.
The cake can become firmer as it sits, but the center should remain rich and chocolatey.
If you prefer a chilled chocolate dessert, refrigeration can be used, although the texture may become firmer.
Make-Ahead Option
This cake is excellent for preparing ahead of time.
Bake it the day before serving and allow it to cool completely. Store it covered, then dust it with cocoa powder or powdered sugar shortly before serving.
In fact, allowing the cake to rest can make slicing easier because the chocolate has more time to set.
Frequently Asked Questions
Why did my flourless chocolate cake sink?
A slight sinking is completely normal. The cake relies heavily on whipped egg whites for air and structure, and as it cools, the trapped air decreases and the cake settles.
Why is my cake too dense?
The most common reason is losing too much air from the whipped egg whites during mixing. Make sure your egg whites are whipped properly and fold them gently into the chocolate mixture.
Can I use milk chocolate?
You can, but the finished cake will be sweeter and less intensely chocolatey. Dark chocolate is recommended for the richest flavor.
Can I make this without a springform pan?
A regular cake pan can work, but a springform pan makes releasing a delicate flourless cake much easier.
How do I know when the cake is done?
Look for a risen cake with a crackly top. The center should remain moist. A toothpick should not come out perfectly clean.
Can I freeze the cake?
For best texture, it is preferable to enjoy the cake fresh. If freezing is necessary, wrap cooled portions very well and thaw them gradually before serving.
Final Thoughts
This Sourdough 6-Ingredient Flourless Chocolate Cake is proof that a simple ingredient list can create an impressive dessert. The combination of dark chocolate, butter, eggs, cocoa, sugar, and sourdough creates an incredibly rich cake with a fudgy center, delicate crust, and subtle fermented tang.
Whether you’re looking for a special dessert for guests, an easy chocolate treat for the weekend, or a creative way to use sourdough discard, this cake is worth trying.
Keep the mixing gentle, watch the baking time carefully, and don’t worry when the cake settles as it cools. That beautiful crackly top and dense, chocolate-filled center are exactly what make flourless chocolate cake so irresistible.