
Easy Homemade Vanilla Ice Cream Recipe – No Churn & Creamy
There is nothing quite like a scoop of homemade vanilla ice cream. Creamy, smooth, rich, and filled with classic vanilla flavor, this easy no-churn vanilla ice cream is a simple dessert you can make without an ice cream machine. With just a few basic ingredients and a handful of easy steps, you can prepare a delicious frozen treat that tastes wonderfully homemade.
This recipe combines cold heavy whipping cream with sweetened condensed milk and vanilla extract to create a rich, creamy base. The whipped cream adds lightness and volume, while the condensed milk provides sweetness and helps give the ice cream its smooth consistency. A little vanilla extract brings everything together with a warm, familiar flavor.
Whether you are making dessert for your family, preparing a summer treat, or simply want something sweet waiting in the freezer, this recipe is an excellent choice.
Why You’ll Love This Homemade Vanilla Ice Cream
There are plenty of reasons to keep this recipe in your regular dessert rotation.
No ice cream machine required: You only need a mixing bowl, mixer, spatula, and freezer-safe container.
Only a few ingredients: The basic recipe uses three main ingredients, with optional additions if you want to customize it.
Creamy and scoopable: Whipping the cream before freezing creates a soft and airy texture.
Easy for beginners: There is no complicated custard-making process, stovetop cooking, or thermometer required.
Easy to customize: Use the vanilla base as a starting point for cookies, chocolate, fruit, caramel, or nut-flavored ice cream.
Make-ahead friendly: Prepare it several hours before serving and keep it in the freezer until dessert time.
Ingredients You’ll Need
Heavy Whipping Cream
Use cold heavy whipping cream for the best results. The cream needs to whip to stiff peaks, so keeping it well chilled is important. If your kitchen is warm, you can even chill the mixing bowl and beaters for a few minutes before starting.
Sweetened Condensed Milk
Sweetened condensed milk provides sweetness and richness while helping create the smooth texture that makes no-churn ice cream so appealing. Use regular sweetened condensed milk rather than evaporated milk, as they are not interchangeable in this recipe.
Pure Vanilla Extract
Vanilla is the star flavor, so choose a good-quality pure vanilla extract if possible. Start with 1 teaspoon and add another teaspoon if you prefer a stronger vanilla taste.
Optional Mix-Ins
The vanilla ice cream base is delicious on its own, but you can easily add your favorite ingredients. Try:
- Mini chocolate chips
- Chopped chocolate
- Crushed sandwich cookies
- Fresh strawberries
- Diced mango
- Caramel sauce
- Chopped toasted nuts
- Fudge sauce
- Cookie pieces
Equipment
You do not need any specialized equipment for this recipe. Gather:
- Large mixing bowl
- Electric hand mixer or stand mixer
- Rubber spatula
- Airtight freezer-safe container
- Measuring spoons
A shallow freezer-safe container can also make the ice cream easier to scoop once frozen.
How to Make No-Churn Vanilla Ice Cream
Step 1: Chill Your Ingredients
Make sure the heavy whipping cream is thoroughly chilled before you begin. Cold cream whips more efficiently and reaches stiff peaks more easily.
If you have time, chill your mixing bowl and beaters as well. This is especially helpful if you are making the recipe in a warm kitchen.
Step 2: Whip the Heavy Cream
Pour the cold heavy whipping cream into a large mixing bowl.
Using an electric mixer, beat the cream until it becomes thick and forms stiff peaks. When you lift the beaters, the whipped cream should hold its shape rather than immediately falling back into the bowl.
Be careful not to overbeat the cream. Once stiff peaks form, stop mixing.
Step 3: Add the Sweetened Condensed Milk
Pour the sweetened condensed milk into the whipped cream.
Using a rubber spatula, gently fold the condensed milk into the whipped cream. Do not stir aggressively. The goal is to combine the ingredients while keeping as much air in the whipped cream as possible.
This gentle folding technique helps create a lighter, creamier finished ice cream.
Step 4: Add the Vanilla
Add 1–2 teaspoons of pure vanilla extract, depending on how strong you want the vanilla flavor to be.
Fold gently until the vanilla is evenly distributed throughout the mixture.
At this stage, the mixture should look thick, smooth, and fluffy.
Step 5: Add Your Favorite Mix-Ins
If you want classic vanilla ice cream, you can skip this step.
For a more exciting dessert, gently fold in your preferred additions. Chocolate chips, cookie crumbs, chopped fruit, nuts, or small pieces of your favorite cookies all work beautifully.
You can also add a swirl of caramel or chocolate sauce. For the best visual effect, lightly swirl the sauce through the mixture rather than completely mixing it in.
Step 6: Transfer to a Container
Spoon the ice cream mixture into an airtight freezer-safe container.
Smooth the top with a spatula. If desired, place a sheet of parchment paper or freezer-safe wrap directly over the surface before sealing the container. This can help minimize exposure to air.
Cover tightly with the lid.
Step 7: Freeze
Place the container in the freezer and freeze for approximately 4–6 hours, or until the ice cream is firm.
For the best texture, allow enough time for the entire mixture to freeze thoroughly.
If you freeze it overnight and find it very firm, simply let it sit at room temperature for a few minutes before scooping.
How to Get the Creamiest Texture
The texture of no-churn ice cream depends largely on how you handle the whipped cream.
First, always start with cold heavy cream. Warm cream takes longer to whip and may not achieve the same volume.
Second, whip the cream only until stiff peaks form. Overwhipping can make the cream grainy and eventually turn it toward a butter-like texture.
Finally, fold the condensed milk gently. The air incorporated into the whipped cream is an important part of the recipe, so vigorous mixing can reduce the volume and make the finished ice cream denser.
Easy Flavor Variations
Once you have mastered the basic vanilla recipe, you can create many different flavors.
Cookies and Cream
Fold crushed chocolate sandwich cookies into the vanilla mixture before freezing. Save a few cookie pieces to sprinkle over the top.
Chocolate Chip Vanilla
Add mini chocolate chips or finely chopped chocolate for a simple chocolate-chip ice cream.
Strawberry Vanilla
Fold in small pieces of fresh strawberries. For extra strawberry flavor, add a small swirl of strawberry sauce.
Mango Ice Cream
Add finely diced ripe mango or a thick mango puree. Make sure any fruit puree is not overly watery, as excess moisture can affect the texture.
Caramel Nut
Swirl caramel sauce through the ice cream and add chopped toasted nuts for a rich dessert with plenty of crunch.
Chocolate Swirl
Drizzle chocolate fudge sauce over the mixture and gently swirl it with a spatula before freezing.
Tips for Successful Homemade Ice Cream
Use cold cream: Cold heavy cream whips faster and produces better volume.
Don’t overwhip: Stop as soon as stiff peaks form.
Fold gently: Preserve the air in the whipped cream by using slow, gentle folding motions.
Use an airtight container: This protects the ice cream from freezer odors and helps reduce freezer burn.
Don’t add too much liquid: Excess liquid can create more ice crystals and affect the final texture.
Allow it to soften slightly: If the ice cream has been frozen for many hours, let it sit at room temperature for about 3–5 minutes before scooping.
How to Serve Vanilla Ice Cream
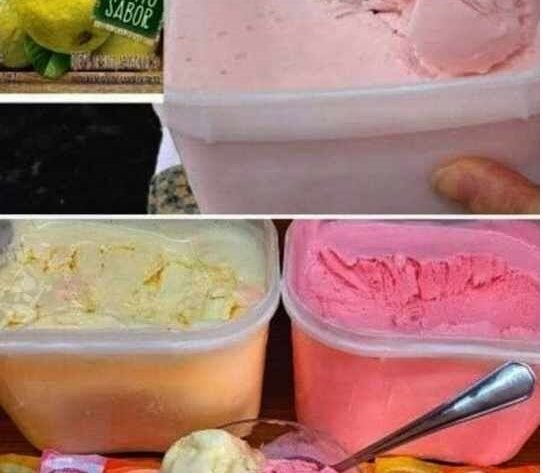
A scoop of homemade vanilla ice cream is delicious by itself, but toppings can make it even more special.
Try serving it with:
- Chocolate syrup
- Caramel sauce
- Fresh berries
- Sliced bananas
- Chopped nuts
- Sprinkles
- Whipped cream
- Crushed cookies
- Fresh mango
- Warm fruit sauce
For an especially delicious dessert, serve a scoop alongside warm brownies, chocolate cake, apple pie, fruit cobbler, or freshly baked cookies. The combination of a warm dessert and cold, creamy ice cream is hard to resist.
Storage
Keep the ice cream in a tightly sealed, freezer-safe container.
For the best texture and flavor, enjoy homemade no-churn ice cream within several days. Make sure the container remains properly covered to reduce freezer burn and prevent the ice cream from absorbing strong freezer odors.
If the ice cream becomes very hard after extended freezing, allow it to rest at room temperature for several minutes before serving.
Can I Make This Without an Electric Mixer?
Yes. You can whip the cream by hand with a whisk, although it will require more time and effort. An electric hand mixer or stand mixer makes the process much easier and helps achieve stiff peaks quickly.
Can I Use Vanilla Bean?
Absolutely. For an extra-special vanilla flavor, scrape the seeds from a vanilla bean and add them to the mixture along with the vanilla extract. The tiny vanilla seeds will also create an attractive speckled appearance.
You can also use vanilla bean paste if you have it available.
Can I Make This Recipe Ahead?
Yes. In fact, this recipe is ideal for preparing ahead of time. Make the mixture several hours before serving and allow it to freeze until firm.
It is also convenient for parties because you can prepare it in advance rather than making dessert at the last minute.
Frequently Asked Questions
How long does homemade vanilla ice cream take to freeze?
It usually needs about 4–6 hours to become firm enough to scoop. Freezing time can vary depending on the container, freezer temperature, and depth of the ice cream.
Why is my no-churn ice cream too hard?
Homemade ice cream can become quite firm when frozen for a long time. Let it sit at room temperature for 3–5 minutes before scooping to soften slightly.
Can I use light cream instead of heavy cream?
Heavy whipping cream is recommended because it contains enough fat to whip properly and contributes to the creamy texture of the finished ice cream. Using a lower-fat cream may produce a different consistency.
Can I add fruit?
Yes. Fresh strawberries, mango, blueberries, raspberries, and other fruits can be delicious additions. Chop fruit into small pieces and avoid adding excessive watery ingredients.
Can I double the recipe?
Yes, provided you have a large enough mixing bowl and freezer container. When doubling the recipe, give the whipped cream enough room to expand while mixing.
Recipe at a Glance
Recipe: Homemade Vanilla Ice Cream
Method: No-Churn
Prep Time: About 10 minutes
Freeze Time: 4–6 hours
Servings: 6–8
Difficulty: Easy
Homemade Vanilla Ice Cream Recipe
Ingredients
- 2 cups cold heavy whipping cream
- 1 can (14 ounces) sweetened condensed milk
- 1–2 teaspoons pure vanilla extract
- Optional mix-ins such as chocolate chips, crushed cookies, fresh fruit, caramel sauce, or chopped nuts
Instructions
- Chill the heavy whipping cream before beginning.
- Pour the cream into a large mixing bowl.
- Beat with an electric mixer until stiff peaks form.
- Gently fold the sweetened condensed milk into the whipped cream.
- Add the vanilla extract and gently fold until combined.
- If desired, fold in chocolate chips, cookies, fruit, nuts, or another favorite mix-in.
- Transfer the mixture to an airtight freezer-safe container.
- Smooth the top and cover tightly.
- Freeze for 4–6 hours, or until firm.
- Let the ice cream stand at room temperature for 3–5 minutes before scooping.
- Serve with your favorite toppings.
Final Thoughts
This easy no-churn vanilla ice cream is proof that homemade dessert does not have to be complicated. With cold heavy cream, sweetened condensed milk, and vanilla, you can create a rich and creamy frozen treat without an ice cream machine.
The classic vanilla flavor makes it perfect on its own, while the simple base gives you endless opportunities to experiment. Add cookies for a fun family dessert, fresh fruit for a fruity variation, or caramel and nuts when you want something extra indulgent.
Once you try how easy this homemade vanilla ice cream is to make, you may find yourself keeping a batch in the freezer whenever you need a quick and delicious dessert.